


How to make a paper airplane
How to make a paper airplane. This guide on five fundamental paper airplane patterns will show you the easy methods for having high-flying fun.
With the help of these paper airplane examples, practice your paper folding skills. These planes are a terrific way to add some humor to your day, whether you’re seeking for a quick escape from the grind of adulthood or are teaching a small child DIY skills. The following examples are all of a beginning or intermediate difficulty. Paper, scissors, a ruler, and double stick tape are the only pricey supplies needed to create the project.
The Dart
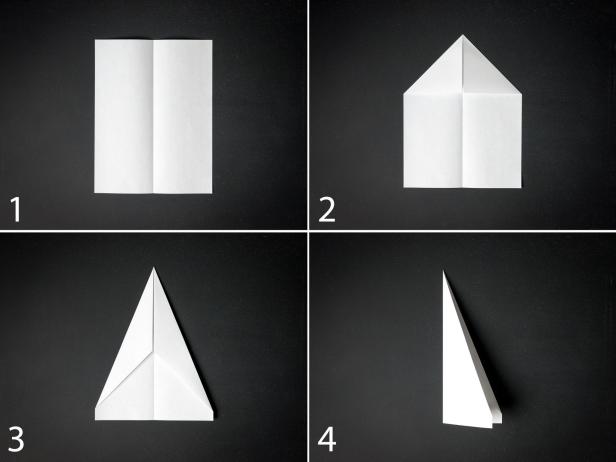
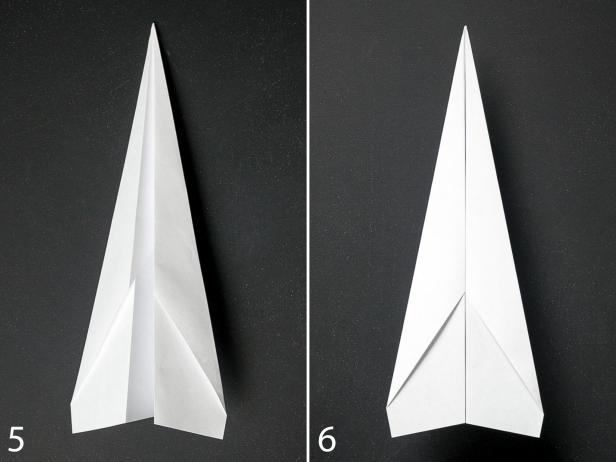
The simplest variation. A straightforward standard that everyone should be able to create.
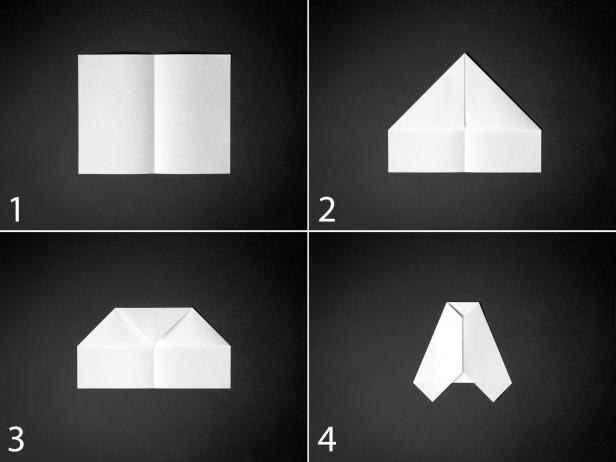
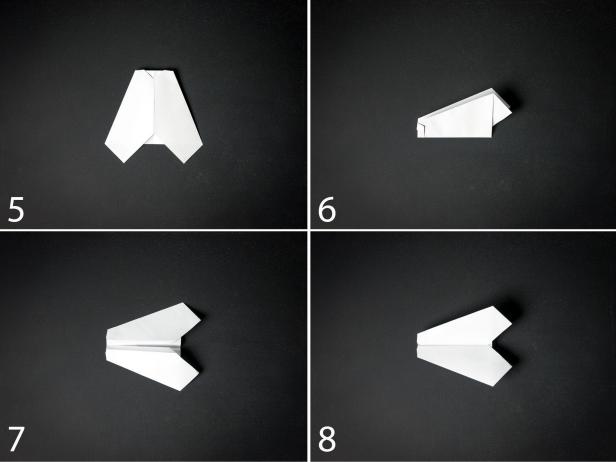
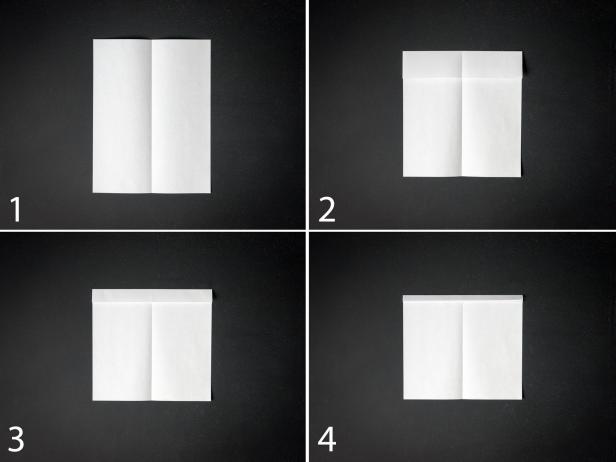
- Vertically, fold the paper in half.
- Fold the top corners of the paper into the middle line after unfolding it.
- The top margins should be folded into the center.
- The plane is folded in half toward you.
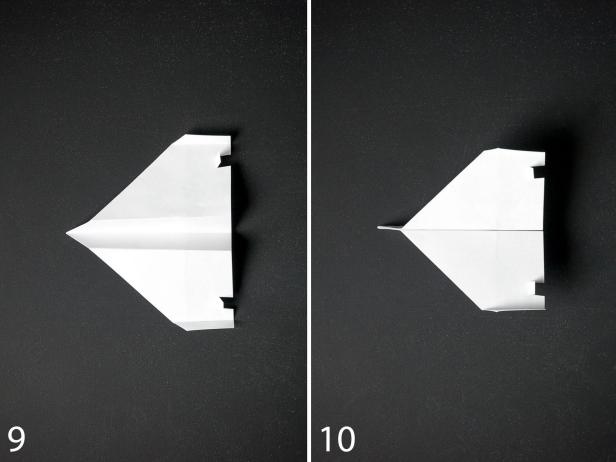
- In order to fold the wings, line up their top edges with the bottom edge of the body.
- Inside the body, apply double-sided tape. This is how the finished plane ought to appear.
The Steath
This one looks nice and is constructed for distance.
- Vertically, fold the paper in half.
- Fold the top corners of the paper into the middle line after unfolding it.
- Fold the peak of the paper 3/4″ from the bottom toward you.
- Both top corners should be folded into the middle.
- To secure the two flaps at the center line, fold the remaining tip over them.
- To the side of you, fold the aircraft in half.
- Fold the wings so that they are 1″ below the plane’s bottom.
- Each wing’s sides should be folded up by 1/2″ tall.
- At the back of every wing, make two tiny openings. Fold the tabs up.
- Inside the body, apply double-sided tape. This is how the finished plane ought to appear.
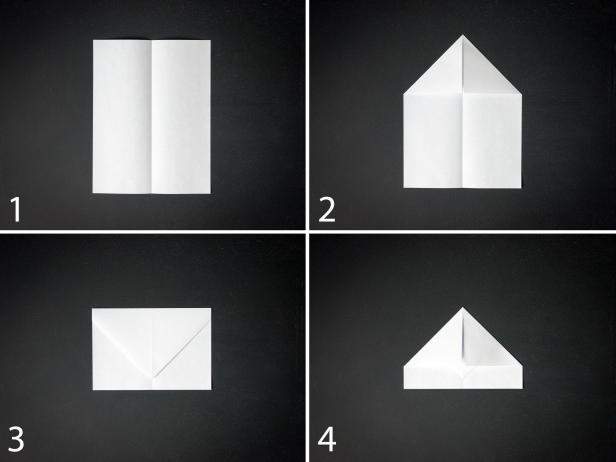
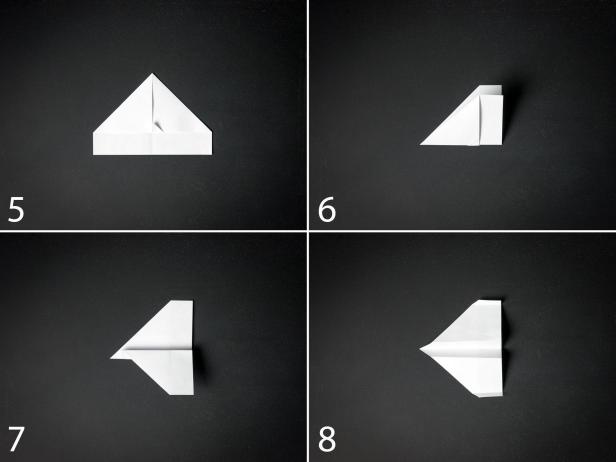
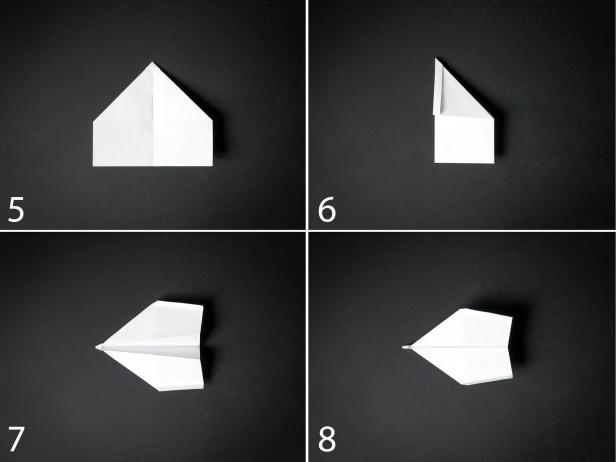
The Bumble
When constructed properly, this stunning bee-like object flies for a very long period.
- The paper is folded in half horizontally.
- Fold the top corners of the paper into the middle line after unfolding it.
- To meet the edge of the preceding fold, fold the peak down.
- The upper sides should be folded into the middle.
- Top edge should be folded 1/2″ away from you.
- In your direction, fold the aircraft in half.
- Fold the wings down so that they are 1/8″ from the plane’s bottom.
- Inside the body, apply double-sided tape. This is how the finished plane ought to appear.
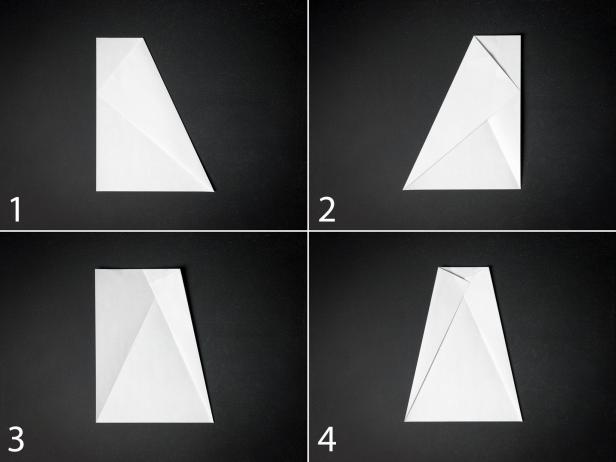
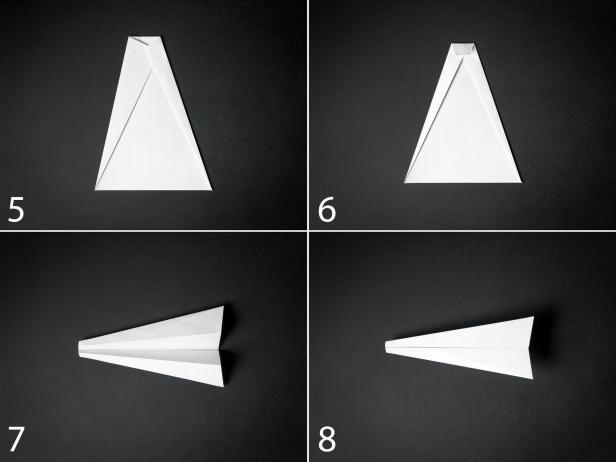
The Hunter
- Vertically, fold the paper in half.
- When the paper is unfolded, fold the top edge down twice.
- To meet the bottom of the last fold, fold the top edge down one more.
- To meet the bottom of the last fold, fold the top edge down one more time.
- To the middle line on the back of the paper, fold the top edges down and away from you.
- In your direction, fold the aircraft in half.
- Fold the wings down 1/2″ in the front and slightly inclined to 1 1/2″ in the back, beginning at the top of the thick nose of the aircraft. The wings’ edges should be 1/2″ folded up.
- Inside the body, apply double-sided tape. This is how the finished plane ought to appear.
The Bullnose
- Making a fold from the top of the paper to the bottom right corner, fold the top right corner to the left.
- Repeat for the left corner after unfolding the paper.
- Once more unfolding the paper, fold the top right corner over to touch the crease created by the initial fold.
- To align with the crease from the second fold, fold the left corner over.
- To join the edge of the fold from step 3, fold the top right edge over. For the other side, repeat.
- Where the right and left layers cross, fold the top edge down and in your direction.
- To the side of you, fold the aircraft in half. Fold the wings down at a little angle, from 1/2″ in the front to roughly 2″ in the rear, while focusing on the nose.
- Inside the body, apply double-sided tape. This is how the finished plane ought to appear.

How to negotiate salary. It’s not unexpected that many people find it difficult to request higher pay once their job hunt is over and they are in possession of an offer. They don’t want to risk the opportunity now that they’ve made it this far, especially if the pay is fair. However, as the 2023 […]

How to increase milk supply. Most of the time, even if you are unaware of it, your body produces just what your baby needs, despite the concerns of many mothers who worry about poor milk production. There are several techniques to determine whether your infant is receiving enough milk. There are methods you can use […]
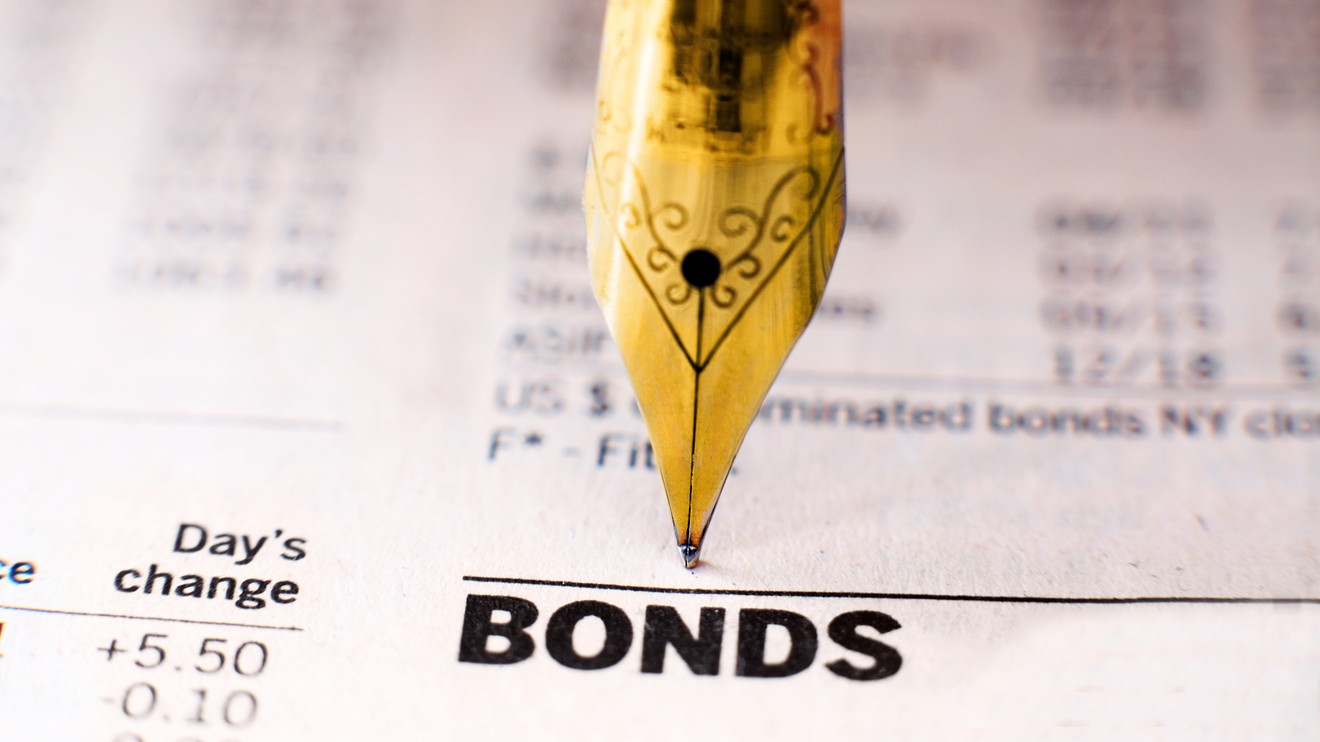
How to buy bonds. It’s not as difficult as it might seem to purchase bonds. But before you buy, you must understand the various varieties and know what to look for in a bond. One option to invest is through bonds, which involve lending money to a government or firm rather than purchasing stock (like […]

How to answer tell me about yourself. The interview question “Tell me about yourself” may seem frightening, but it doesn’t have to be. Here are our top suggestions for a terrific response. When asked in an interview, “Tell me about yourself,” it can be challenging to respond if you are unprepared. Finding a job can […]
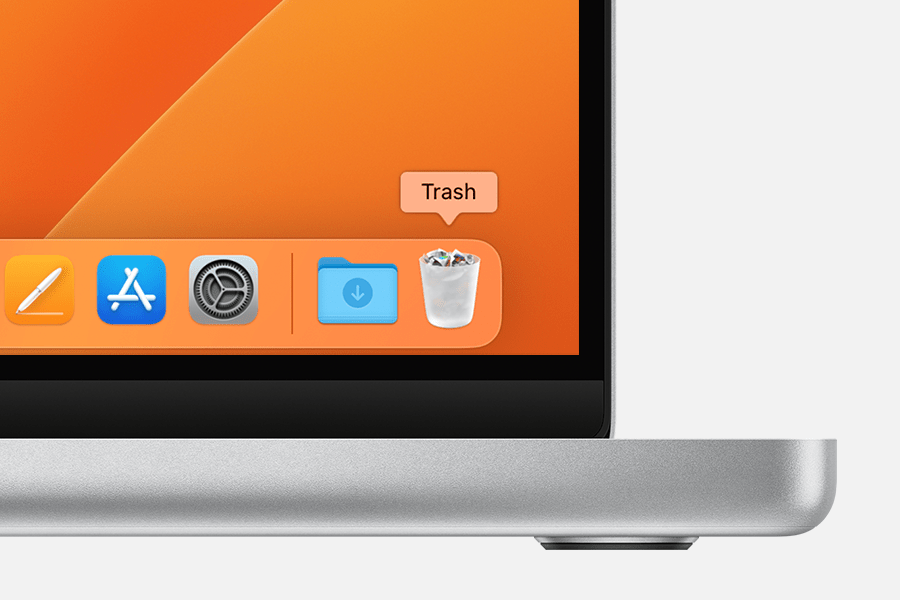
How to uninstall apps on mac An app can be deleted or uninstalled from your Mac in order to free up storage space for other things. Launchpad or the Finder are two options for doing this. Use Launchpad to delete apps that were downloaded from the App Store Launchpad offers a convenient way to delete […]
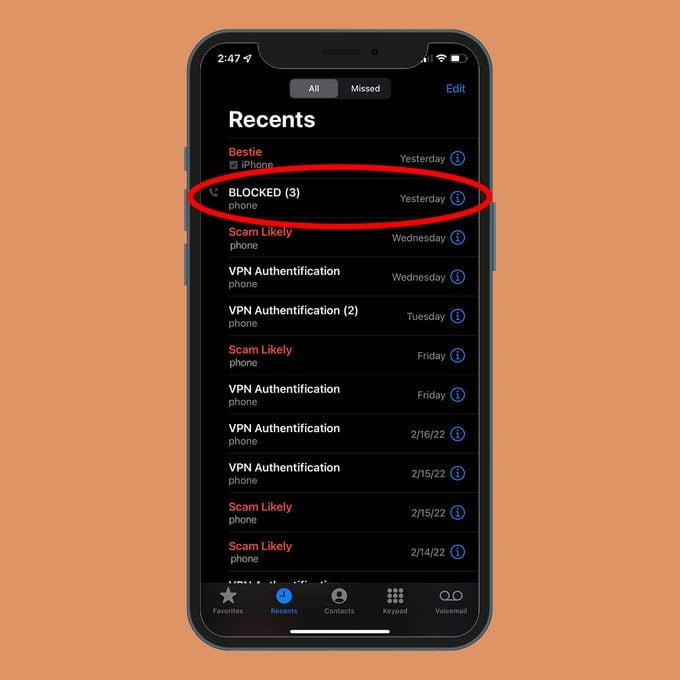
How to Unblock a Number on an Android Phone Here’s how to restore calls and texts from a blocked number on an Android device: Get the Phone app open. The More icon, which resembles three vertical dots, should be tapped. Select Blocked Numbers under Settings. The contact you want to unblock has an X next […]