


Cheese and Garlic Crack Bread (Pull Apart Bread)
Cheese and Garlic Crack Bread is a fitting name for this since it’s basically garlic bread on crack.
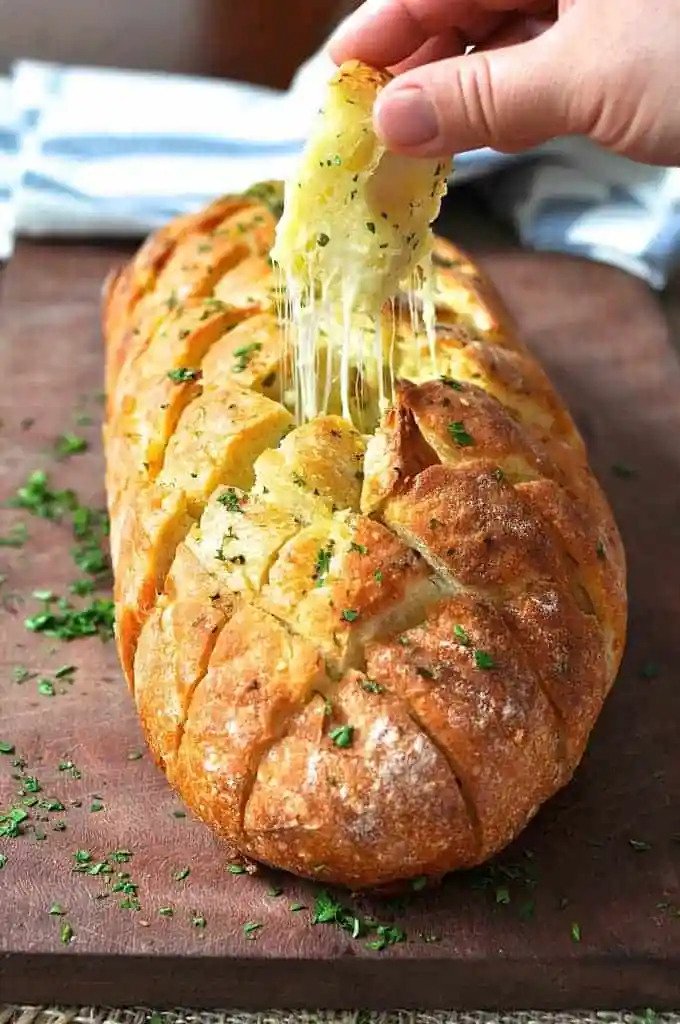
In essence, it’s like cheesy garlic bread, but much more entertaining AND delicious! In the shape of pull-apart bread, cheese, garlic, and bread. Nothing can go wrong. At whichever event you bring it to, it will undoubtedly be the most well-liked item!
Cheese and Garlic Crack Bread Ingredients
- 1 crusty loaf, particularly one made of Vienna or sourdough
- 1 cup of mozzarella cheese, shredded (or other melting cheese)
- 100 g / 1 stick (8 tbsp) softened unsalted butter
- 2 minced large garlic cloves
- 3/4 tsp salt
- 1 tbsp finely chopped fresh parsley.
Instructions
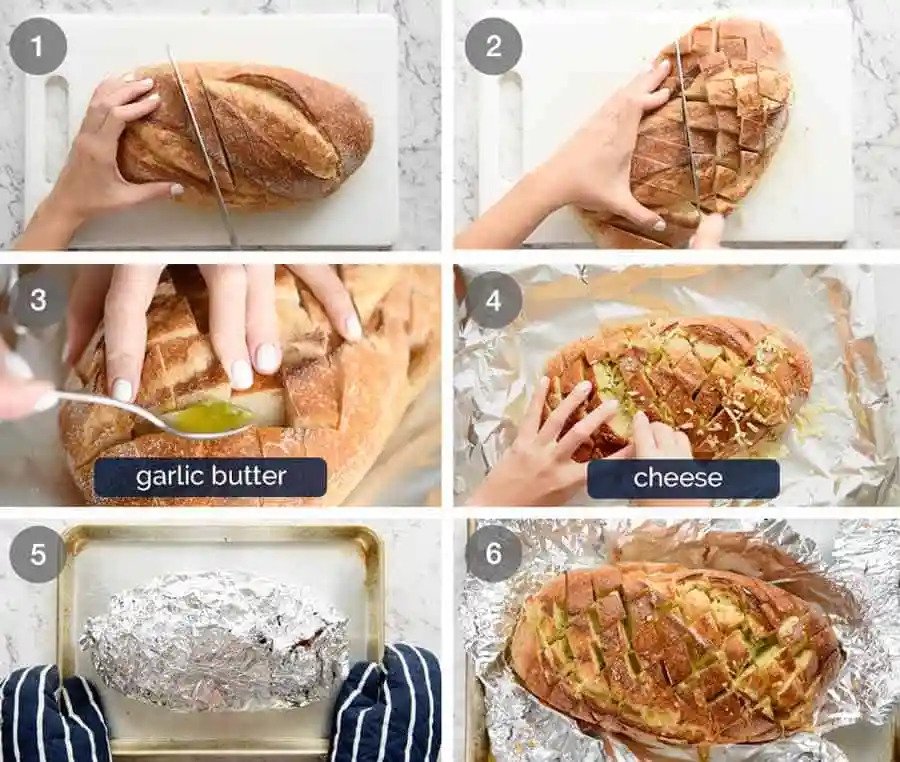
- Melt the butter, garlic, and salt in a microwave-safe bowl with the oven temperature set to 180C/350F. Add the parsley and stir.
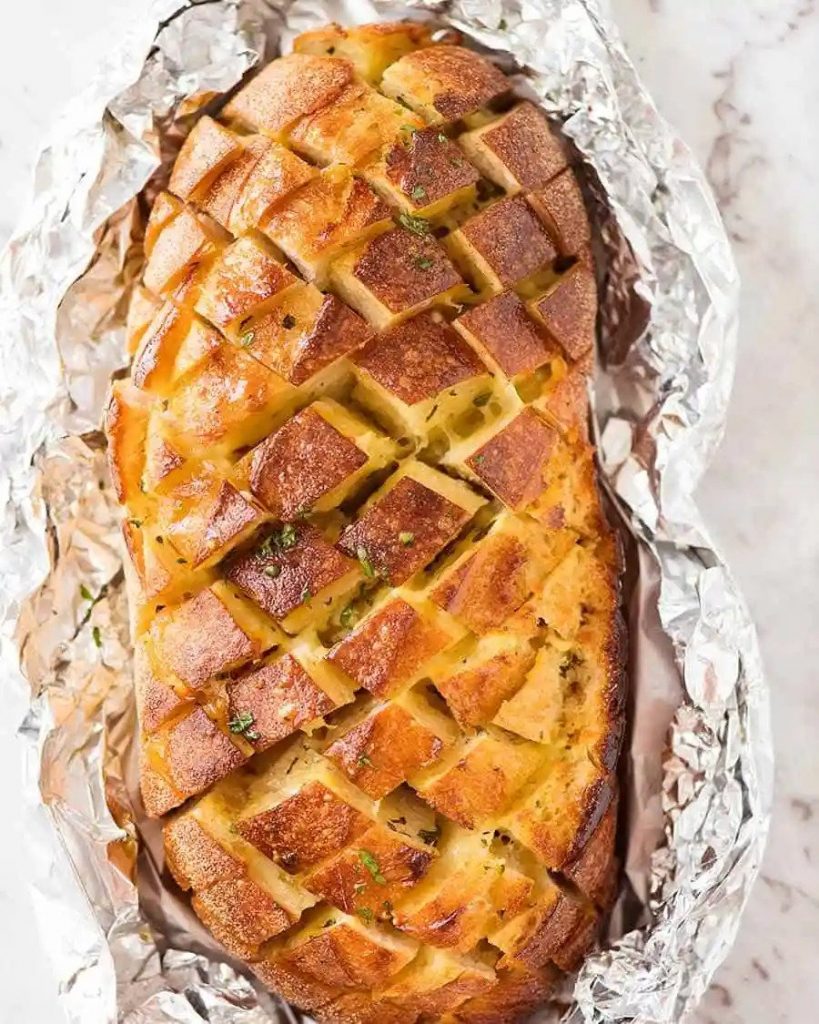
- The bread should be cut diagonally into diamonds the size of 2 centimeters (1 inch) but not completely.
- Pry each crack open with your fingers or a knife, add a teaspoon of butter, and stuff each one with a pinch of cheese. Although it may sound like a lot of work, I swear it will be well worth it! It’s nice to have some of the butter drizzled over the crust, so you don’t have to be super neat.
- Apply the remaining butter to the surface.
- Wrap the bread in foil and bake for 20 minutes, or until most of the cheese has melted, then remove the foil and bake for 5 to 10 minutes more to get a nice crust on it.
- Serve right away. For the best ways to prepare ahead, see note 1.

Notes
- Make Ahead: Instead of melting butter, use softened butter and combine it with garlic, salt, and parsley before spreading it into the cracks. Wrap, stuff with cheese, and freeze or refrigerate. Thaw before cooking, and then bake according to the recipe.
A crusty sourdough loaf is required if you want to make it ahead of time and have it ready to serve in just two minutes in the microwave. Prepare per recipe (counting opened up stage), then envelop it with foil and let it cool. To serve, simply microwave for 1 1/2 to 2 minutes on high to melt the cheese once more. Refrigerate for up to 3 days. Even when reheated in the microwave, the crust retains its crusty appearance because it becomes so crusty in the oven. - Type of bread: The better the bread holds together when pulled apart, the denser it is.The best food is sourdough!
Don’t use bread dough that hasn’t been cooked. - “Speedy Tip” **Update** A reader pointed me in the direction of a fantastic “SPEEDY” advice that I ought to share with you! Cream the butter, rather than melting it. After that, cut diagonal slices in only one direction and generously spread butter into each crack on both walls. After that, cut the bread into diamonds with a knife, and the butter will be spread into the new crevices that are being cut as you drag the knife through the bread. While this is not quite as uniform as butter, it is a small compromise for a speedy version. I’m grateful to CJ for the tip!
- Nutrition per serving, assuming 10 people consume this
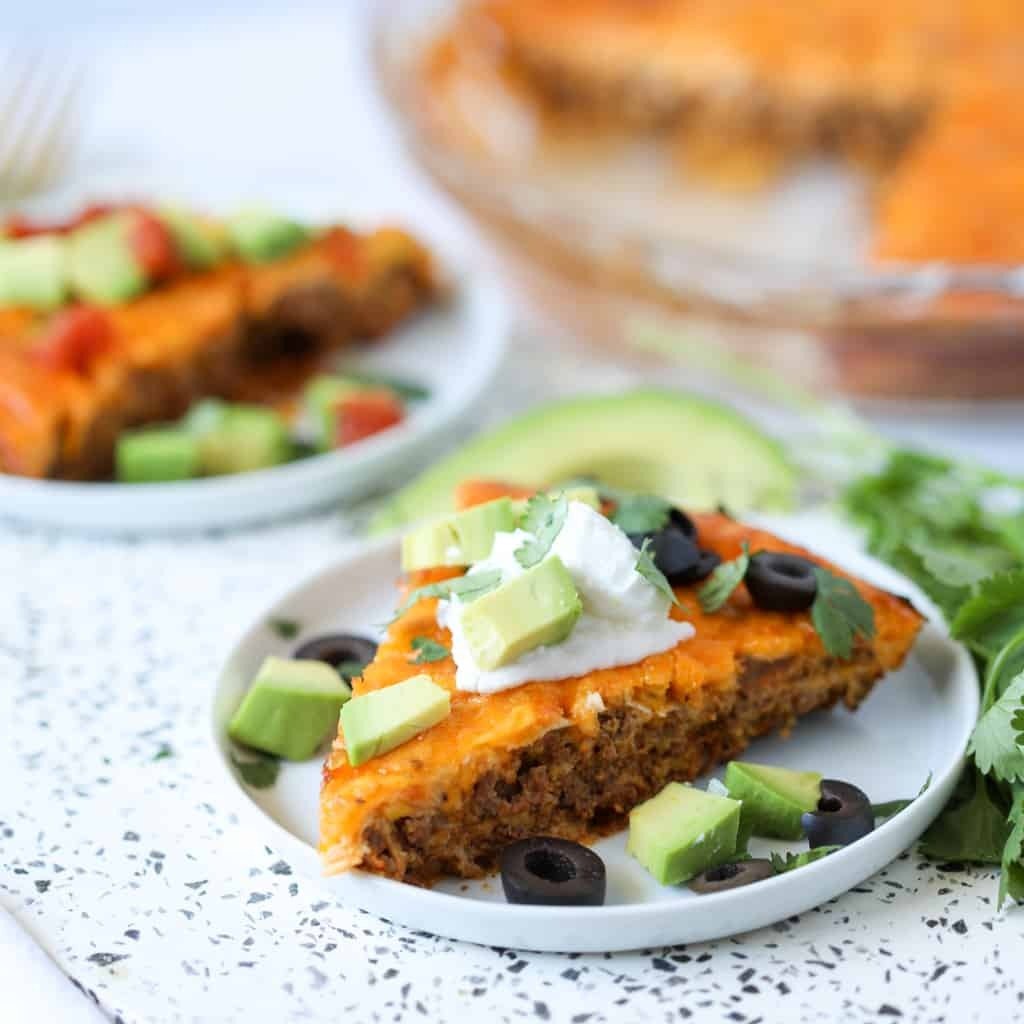
Crustless Taco Pie is a terrific way to experience a change from traditional tacos without adding gluten or refined carbohydrates. Only 3 net carbohydrates per serving! You’ll adore this low-carb taco pie dish, which uses ground beef, a flavorful sauce, lots of cheese, and your preferred taco toppings. Crustless Taco Pie Ingredients 1 pound of 80/20 […]
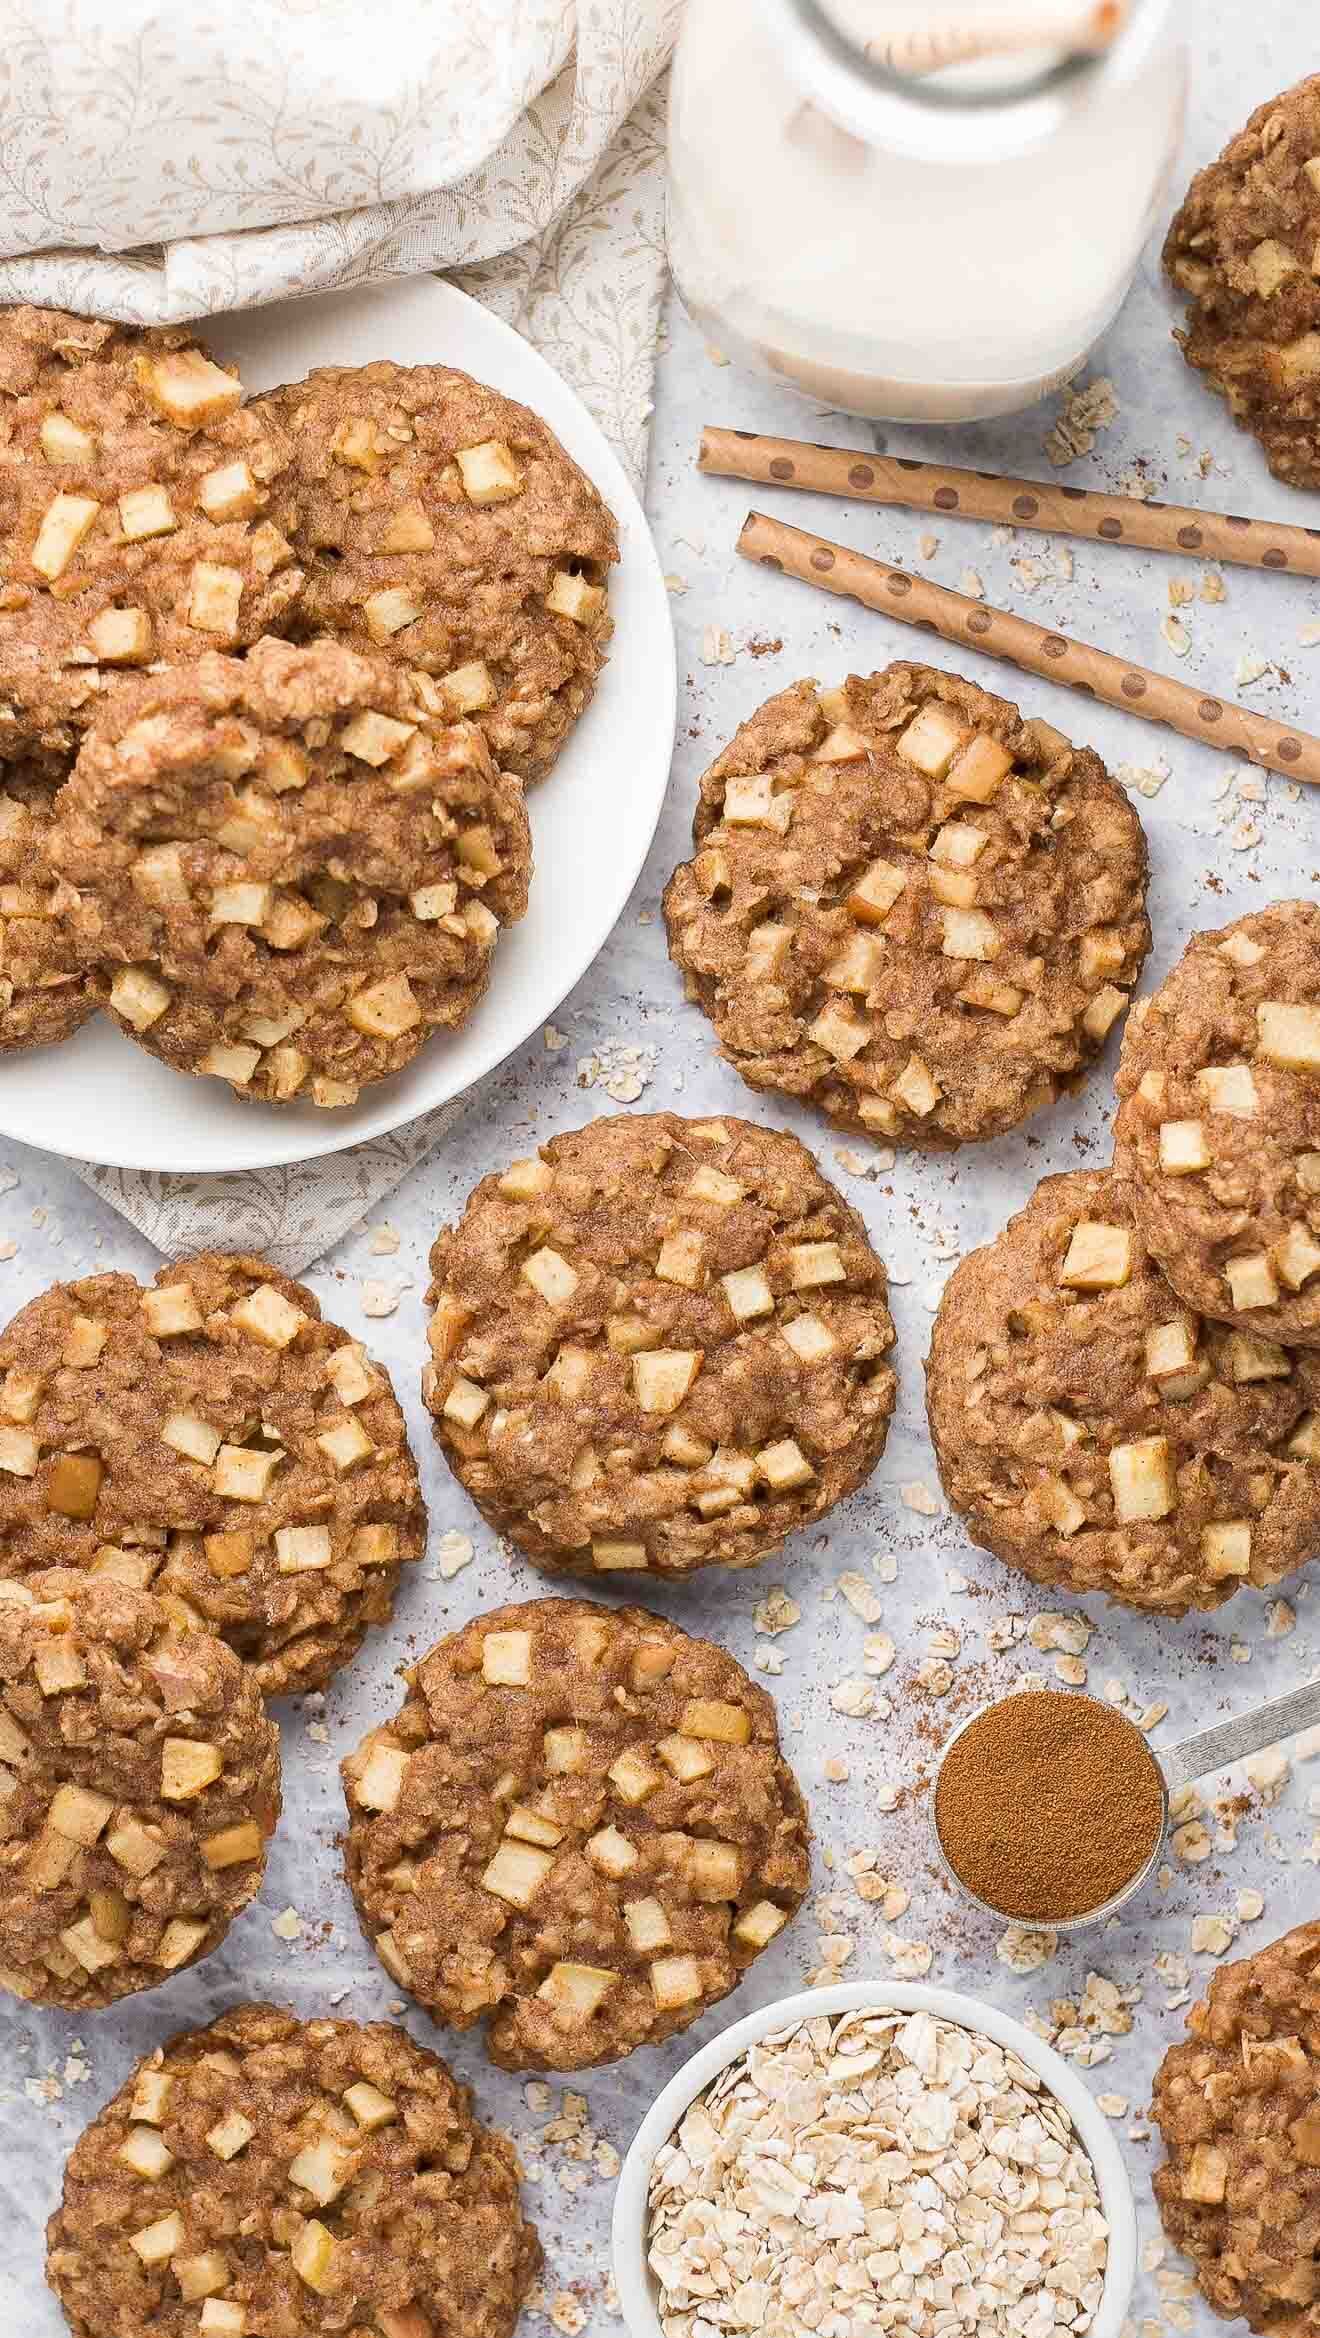
Healthy Apple Pie Oatmeal Breakfast Cookies are ideal for quick breakfasts on-the-go or even snacks! Like the well-known dessert, they are soft and chewy and packed with delicious apples and warming spices. If kept in an airtight container in the refrigerator, leftover cookies will last for at least a week. They also freeze quite well. A […]
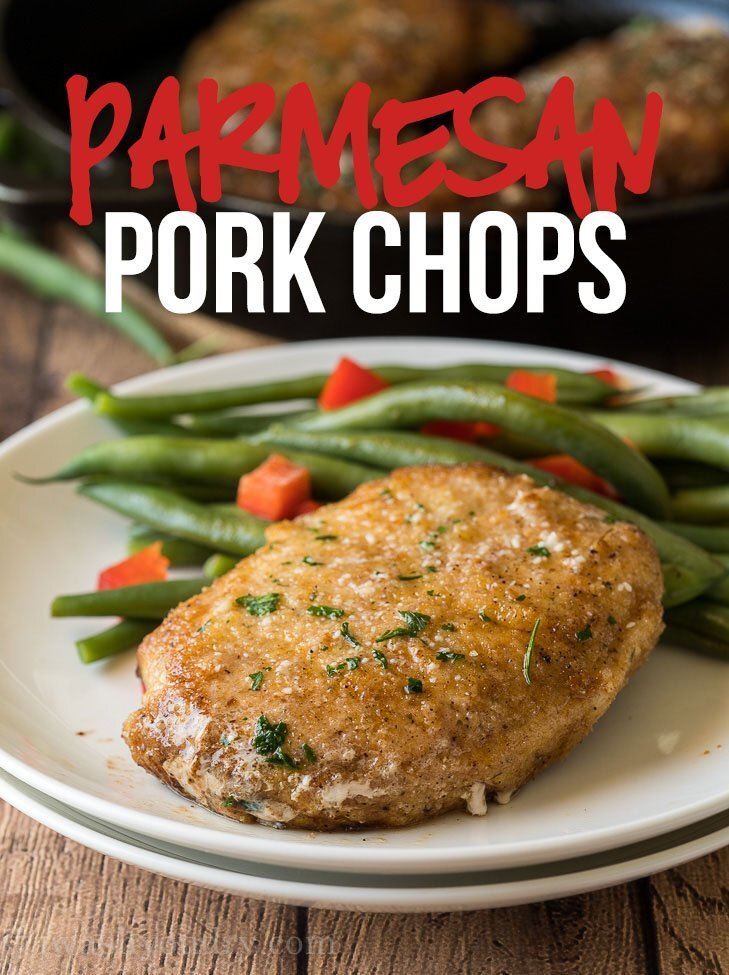
Garlic Parmesan Pork Chop is quite quick to prepare and has a crunchy Parmesan coating on the outside. In collaboration with Land O’Lakes, I’m delighted to provide another dish for a successful weeknight dinner. These incredibly excellent, tender, and fragrant pork chops may be made with only a few simple ingredients. We’re using boneless pork […]
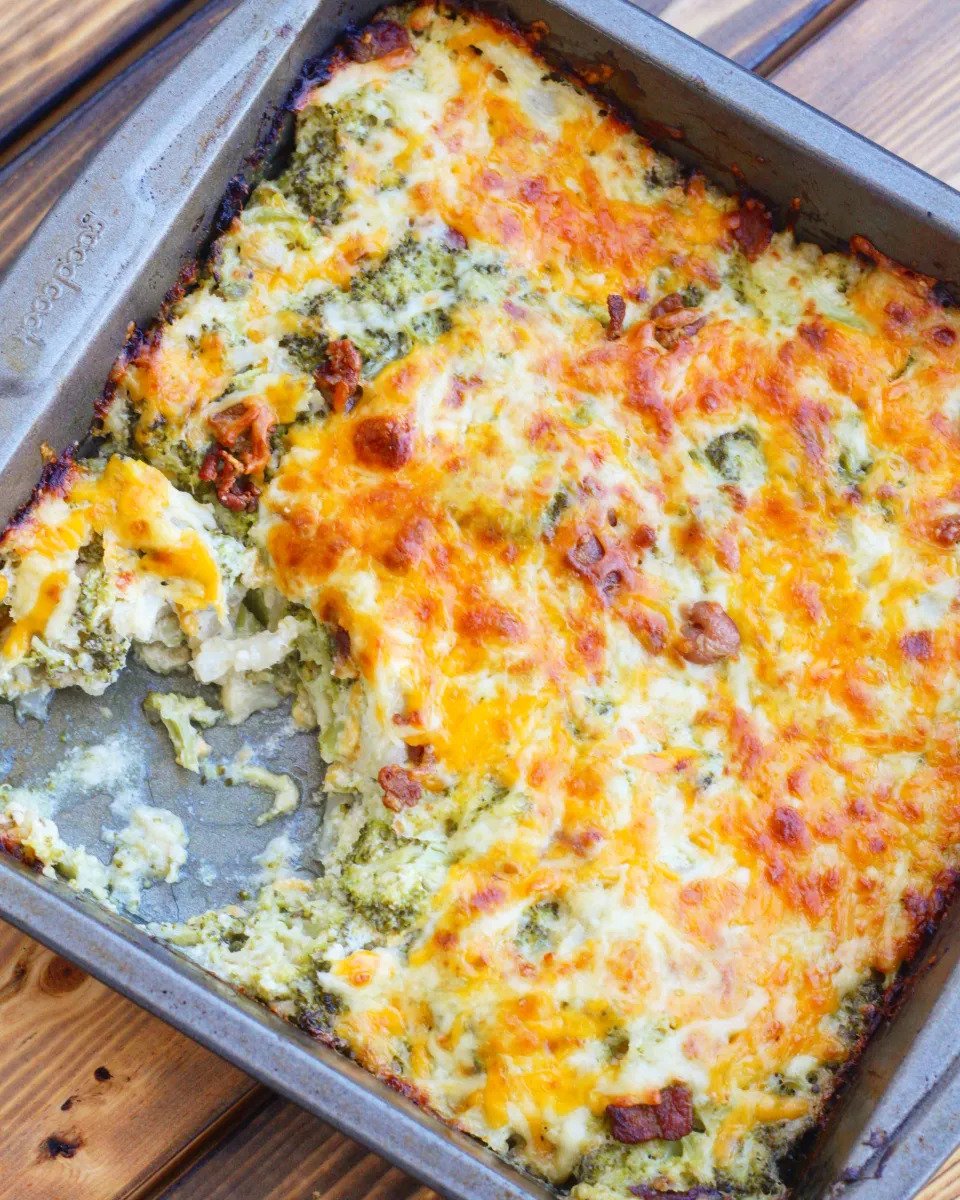
Loaded Cauliflower Broccoli Casserole is the ideal dish to serve as a side dish at supper. This meal is so stuffed with bacon, cheddar cheese, and sour cream that you won’t even notice the absence of potatoes. On the keto diet, I truly miss eating potatoes, but fortunately, I’ve had cauliflower and broccoli in their place, […]
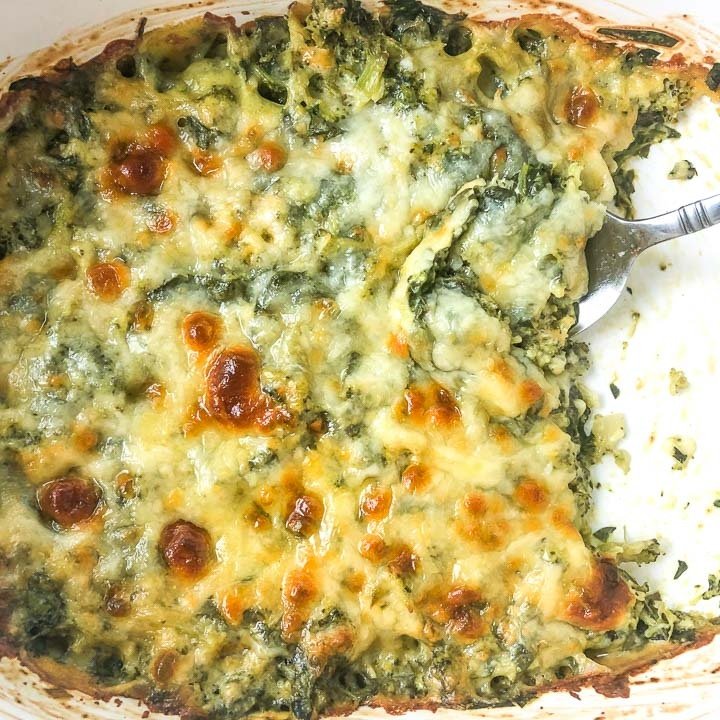
Keto Spinach Broccoli Cheese Casserole is a nutritious comfort food. It produces a delectable low carb side dish. With only 2.6g net carbohydrates, this creamy and cheesy vegetable casserole is perfect for a holiday feast. Your family will adore the flavor of this broccoli cheese casserole even if you are not following a ketogenic diet. Who […]
Mini Pumpkin Pie Cups – THE BEST Christmas treat to prepare! They are vegan, gluten-free, and paleo-friendly, but I guarantee no one will ever suspect they are healthier. I adore this recipe since it is so simple to make while yet looking elegant and is a lot of fun to bring to a holiday party. […]